Monday, November 29, 2010

The Perfect Dinner Roll

Yum
I liked my original roll recipe okay, but it was not perfect.  When I first made them I thought the problem was that I didn't let them rise enough, they were just kind of heavy, especially when they cooled down.  They still tasted great, and didn't turn into rocks, like some of my other experiments.  So, I figured that they were the closest thing I had to a success...that is until I had my duh moment.  I have a fantastic bread recipe, why am I trying to reinvent the wheel, when I already have something that works...duh!!! So here are the results of my duh moment, and they were delicious, the perfect consistency and not too filling...I ate two after dinner...so yes, they are perfect, or as perfect as I have been able to achieve so far with my baking. :)


Perfect Dinner Rolls

Use my bread recipe, except grease muffin tins instead of a bread loaf pan.  Scoop dough into muffin tins by using a spring release cookie dough scoop (1 1/2"- 2" size).

Cover and allow to rise for 20 minutes.  Then bake at 400F for 20-25 minutes.  After 15 minutes, top with soy-free margarine to help with browning.

These would also make great slider buns...maybe we'll have to have those tomorrow. :)


Sunday, November 28, 2010

Mashed Potato Cakes and Sweet Potato Biscuits

Yum
So, I'm still on my kick for using up my Thanksgiving leftovers and today is all about the sides.  I have tons of mashed potatoes and sweet potato casserole, so here is what I did to deplete those....The mashed potato cakes are scrumptious, just like anything fried.  It's crispy on the outside and smooth and creamy on the inside.  And the sweet potato biscuits, are sweet of course, but have enough salt to balance it out and so you can still call it a biscuit.  They didn't rise much, so I was worried, but they were moist and light, and I couldn't stop eating them, mainly I was trying to get my tastbuds a chance to understand what it was eating (Sweet Potato Fries do that to me, too, something about the sweet but savory combo).  I think these biscuits would be great for a turkey sandwich...hmm maybe I should try that tomorrow. ;)


Mashed Potato Cakes (adapted from here)
2 cups left over mashed potatoes, chilled
1 egg
1 tablespoon dried parsley
1/2 teaspoon onion powder
~1/4 cup gluten-free flour
~1/3 cup gluten free corn flake crumbs
canola oil

Directions

1. Mix potatoes, egg, parsley, and onion powder.
2. If mashed potatoes are too moist, add flour, until you can easily for patties, I needed 1/4 cup
3. Form into 6 patties about 1/2" thick.
4. Dip in crumbs.
5. Saute in canola oil over medium heat, adding more as needed, until crispy and golden brown on both sides.

We ate ours with leftover gravy, and my husband (who doesn't eat leftovers) ate two. :)


Sweet Potato Biscuits (adapted from here)
1 cup gluten-free all purpose flour
1 tablespoon baking powder
2 teaspoons sugar
1 teaspoon salt
2 tablespoons palm oil shortening
3/4 cup mashed sweet potatoes (I used our leftovers from our sweet potato casserole, minus the topping)
1/4 cup So Delicious Original Coconut Milk or rice milk

Directions

1. Preheat oven to 400F.
2. In a medium bowl, combine flour, baking powder, sugar and salt.  Cut in the shortening.  Mix in the sweet potatoes, and enough milk to make a soft dough (I needed 1/4 cup).
3. Turn dough out onto a floured surface, and roll or pat out to 1/2" thickness.  Cut into circles using a biscuit cutter.  Place biscuits onto a greased baking sheet.
4. Bake for 12-15 minutes, or until golden brown.

These are sweet, and I think they were extra sweet because I used the casserole leftovers...but they are like most sweet potato recipes...they are sweet, yet not sweet.  And you keep eating them because your tastebuds don't understand what's just hit them. :)

Saturday, November 27, 2010

Turkey and Green Chili Gorditas

Yum
Once again, I'm using up my leftover turkey and trying to change the flavors enough that my family will not think they are eating leftovers...and this was beyond a success, if stuffing yourself until you're ready to pop, counts as a success.
My boys actually loved the gorditas dipped in ranch...simple, yet they actually tried something new. :)

We'll start with the gorditas, I've never had gorditas before, let alone made them, but they sounded good, so I gave them a shot.  I modified the recipe on the back of my masa flour package and this is what it is:


Gorditas

2 cups Masa flour
1/4 cup gluten-free all purpose flour
2 teaspoons baking powder
1/2 teaspoon salt
2 tablespoons palm oil shortening
1 1/2 cups warm water
canola oil for frying

Directions
1. Heat griddle to medium heat

2. Combine masa, flour, baking powder and salt.  Add shortening and water.  Knead until all ingredients are well blended and you are able to form a ball.  Divide dough into 14 balls.  Keep dough cover.  Using a rolling pin or your hands, press each ball out to form a circle that has about a 5-inch diameter (don't worry if they are smaller) and is 1/4" thick.

3. To form and cook the gorditas, lay gordita on preheated griddle.  Cook each side for 2-3 minutes or until lightly browned.  While still wearm, pinch edge to form a 1-inch rim.  It should look like a small saucer.

4. Preheat over to 170F. Line a cookie sheet or baking pan with paper towels. Set aside.

5. To fry gorditas, use a large frying pan.  Add enough oil to cover bottom and fry 2 to 3 gorditas at a time for 1 to 2 minutes, turning frequently, until both sides are golden brown and crisp. Place fried gorditas in the baking pan and set in oven to keep warm.

6. Top with whatever toppings you like...shredded beef, pork, or my turkey and green chilies below, along with lettuce, tomatoes, etc.


Turkey and Green Chili Filling


1/2 C turkey gravy (if you don't have any add ~1/4 cup chicken stock)
3 C chopped turkey
7 oz can chopped green chili peppers
1 teaspoon ground cumin
1 teaspoon chili powder
1/2 teaspoon onion powder
1/2 teaspoon garlic powder
1/2 teaspoon salt
1/2 teaspoon black pepper

Mix all ingredients together in saucepan, until warm and bubbly. Serve over gorditas, or for enchiladas, burritos, on top of rice, etc. :)

This post is featured on The Whole Gang's Real Food Weekly.

Barbecue Turkey Pizza

Yum
Well, I'm sure you can guess from the title...I'm trying to use up my leftover turkey from Thanksgiving.  Honestly, I love just eating leftovers, having my Thanksgiving meal over and over...but my family doesn't.  My husband refuses to eat anything that's classified as a leftover, so I have to get creative, so it doesn't appear to be leftovers.  This first recipe, really isn't a recipe, just what I did to use up some of the turkey, mainly because my favorite type of pizza before this new diet was Pier 49's Lombard Street--which is a barbecue chicken pizza...this worked to fill my craving. :)


Barbecue Turkey Pizza

barbecue sauce
cooked turkey, chopped
cooked pizza crust
cheese or dairy-free alternative (optional)
olive oil

Directions
Toss turkey with 1-2 tablespoons of barbecue sauce, set aside.  Brush Pizza Crust with Olive Oil. Spread the rest of the barbecue sauce onto the pizza crust and top with turkey and cheese.

Bake on a pizza stone at 450F for 6-8 minutes

Wednesday, November 24, 2010

Caramel Chex Mix

Yum
In my Thanksgiving menu, I mentioned that I was going to make this to snack on, and of course, I did.  But when I made it, I was reminded how little I like measuring out 9 cups of cereal...in fact, I refuse to do that.  Why does Chex make recipes that don't just allow us to dump the box of Chex (which contains about 13 cups), instead of measuring it out?  So, I've posted their recipe modified, so I can use the whole box, well, both boxes actually, and use a saucepan and oven instead of the microwave.  Warning, this makes a ton, and you will eat it all! Oh, and of course, it's gluten-free, dairy-free and soy-free!


Caramel Chex Mix

1 box (~13 cups) Rice Chex cereal
1 box (~13 cups) Corn Chex cereal
3 cups packed brown sugar
1 1/2 cups Earth Balance soy-free margarine
3/4 cup light corn syrup
3/4 teaspoon baking soda

Directions
1. Heat oven to 250F.  Spray a couple of large cookie sheets and/or roasting pans with cooking spray. Dump cereal into pans.
2. In a large saucepan, stir together brown sugar, margarine, and corn syrup.  Cook and stir 8-9 minutes over medium-high heat until mixture starts to boil.  Boil 1 minute, stirring constantly.
3. Remove from heat.  Stir in baking soda. Pour over cereal mixture, stirring until evenly coated.
4. Bake 40-50 minutes, stirring every 15 minutes, until coating is set.
5. Spread on waxed paper to cool, about 10 minutes.  Break into pieces and store in an airtight container.


Sunday, November 21, 2010

Thanksgiving Menu

Yum
So Thanksgiving is only a few days away, and I'm hosting my first Thanksgiving meal.  I'm really excited, but I really hope everything turns out, but don't we all. :)  I thought I would be nice and let you all know beforehand what I'm planning, in case you need ideas. So here it is:

Turkey, of course, I'm using Alton Brown's Honey Brine Recipe and then cooking it in an oven bag to keep it moist.

Gravy, I'm not too worried about it, but I am going to use Triumph Dining's guidelines (but soy-free margarine, instead of butter), mostly because I'm curious about using the sweet rice flour in the gravy.

Mashed Potatoes, I'm winging it, because that's all I have ever done.  I do have both russets and reds right now, so I'll see what I'm in the mood for that morning.  Then I may use the So Delicious Coconut Milk or chicken broth along with soy-free margarine.  But most importantly, they are going through the potato ricer so they will be nice and smooth. :)

Stuffing, my wonderful sister-in-law was nice enough to share her family's recipe with me, the only change I have to make is using gluten-free dry bread cubes and, of course, making sure the margarine is soy-free. :) Here's the recipe (I hope it's okay that I'm sharing, I give all credit to my sis-in-law and her family):

Grandma Tolman's Sausage Stuffing (gf/df/sf):
1 lb bulk regular pork sausage (check ingredients, make sure the sausage you use is safe)
1 1/2 cups chopped celery (~3 stalks)
1 cup chopped onion (~1 large)
1/2 cup soy-free margarine
1 tablespoon snipped fresh sage or 1 teaspoon poultry seasoning or dried sage
1/4 teaspoon black pepper
12 cups dry gluten-free dry bread cubes
1 to 1 1/4 cups chicken broth (check and make sure it's safe)

Directions
Cook celery, onion, and sausage in hot margarine until tender and sausage is no longer pink. Remove from heat.  Stir in sage and pepper.  Place dry bread cubes in a large bowl (make sure it is very large so you have room to stir -th ebread will shrink down as you add the liquid); add onion mixture.  Drizzle with enough chicken broth to moisten, tossing lightly to combine ( adjust liquid depending on how moist/crispy you like your stuffing).  Place stuffing in a greased 2-quart casserole.  Bake, covered, at 325 degrees for 30 to 45 minutes or until heated through.  Remove the cover during the last few minutes if you like a crispy top on the stuffing.


Sweet Potato Casserole, probably my favorite side every year, I'm using my recipe from the blog.


Green Beans, I know that green bean casserole is a tradition in most homes, but not in mine, but I do love green beans and mushrooms, so I'll do my green bean mushroom saute.


Steamed Corn...simple I know, but this is about the only cooked vegetable my husband likes, so I have to have it on the table.


Green Salad...another simple side, but my boys will usually eat at least a little salad, so anyway I can get veggies in I will. And with the salad, I need to prep fresh Ranch Dressing, so my little one and I can fully enjoy his salad. ;)


Rolls, I'm using the recipe that I adapted from The Pioneer Woman

Pumpkin Chip Muffins, from my blog.  I actually have some frozen, so I'll just thaw them, can't get easier than that!


Apple Crisp, I'm using my crisp recipe, just subbing apples for the raspberries and peaches.  I decided against pie, because crisp is easier and man, I'm making everything, might as well make it easier on myself.

And if that isn't enough for all 5 of us ;) I thought I'd have deviled eggs as an appetizer while we're waiting on food to cook, using canola oil mayonnaise to make them safe for everyone.

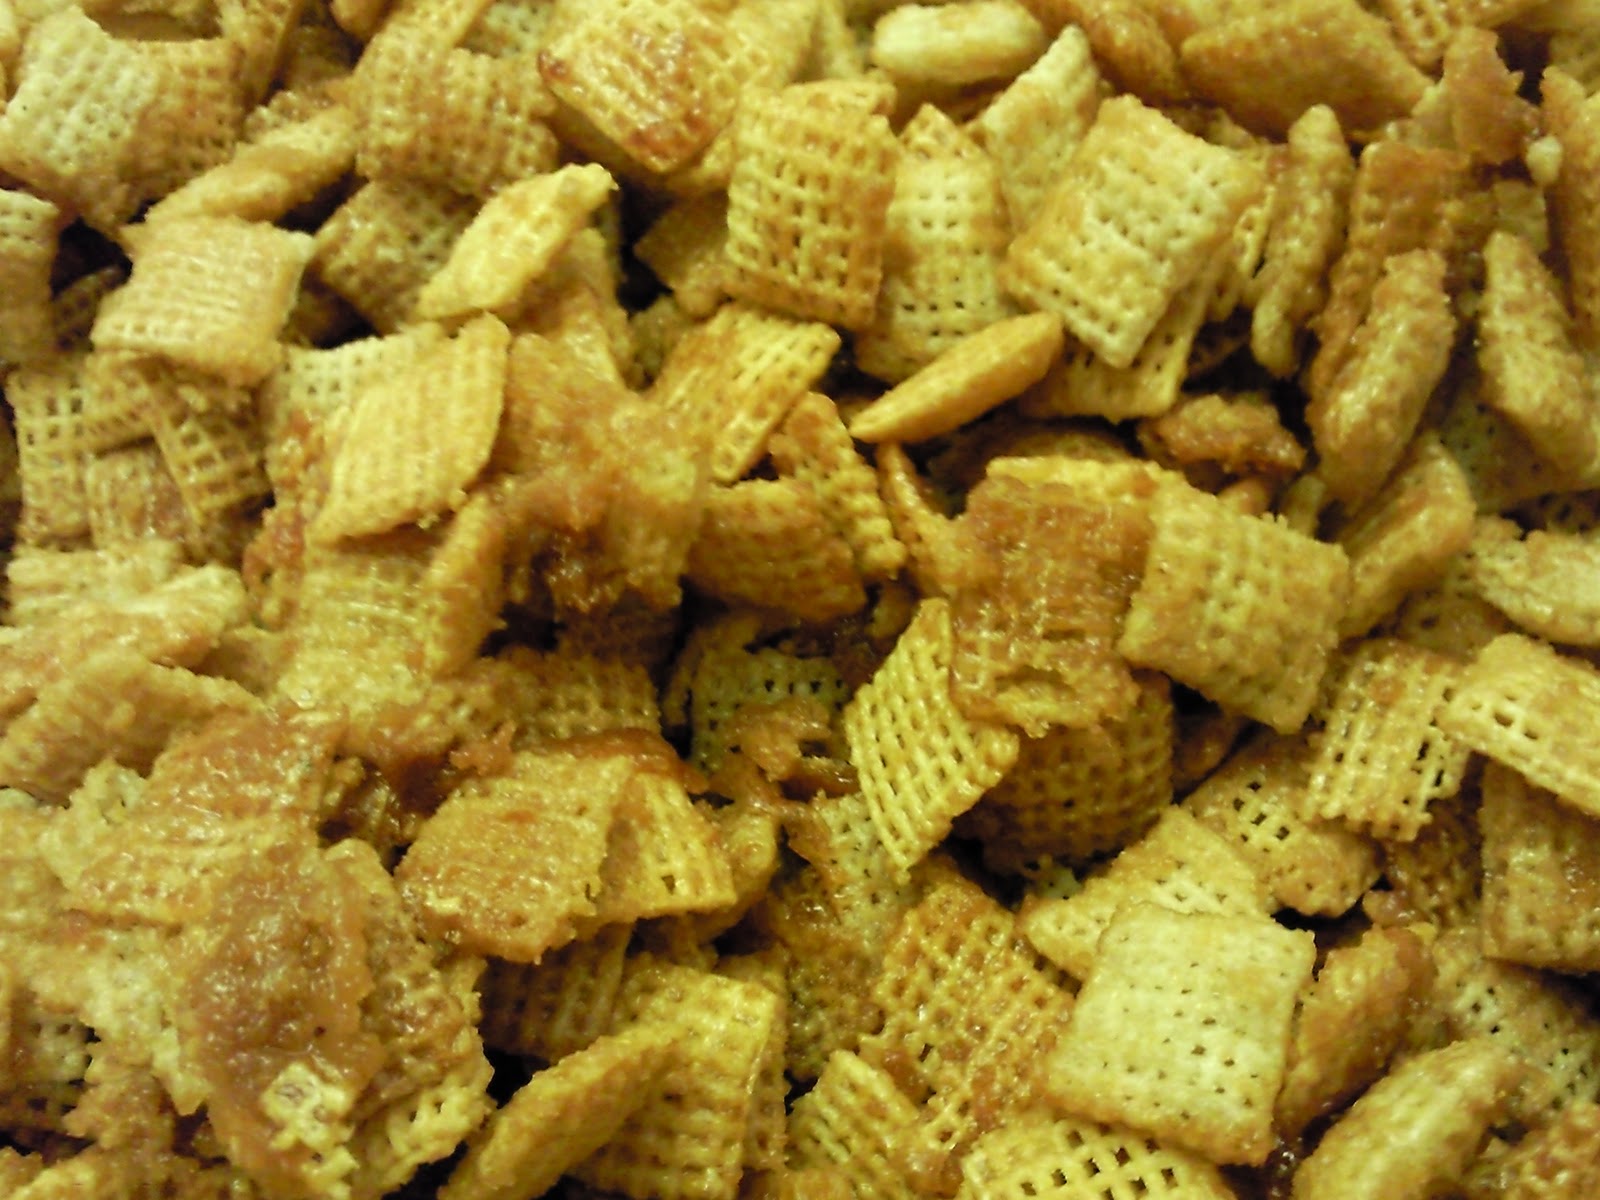
And of course, I have to have my Caramel Chex Mix, to snack on through out the weekend, too.  Just sub the butter for soy-free margarine (I'm so happy this was on sale at Smith's Marketplace last week!).


Happy Thanksgiving, everyone!

Saturday, November 20, 2010

Cinnamon Rolls (gluten, dairy, soy, and egg-free!)

Yum
So, with the success of my dinner rolls (adapting Pioneer Woman's recipe), I thought I'd give her cinnamon rolls a try, and it worked!  They were delicious and I've eaten way too many of them, and still have way too many in  my house (and I halved the recipe, I put the whole recipe below though).  Go to her website for the step-by-step instructions...making the dough is pretty much like the dinner rolls, just less salt, so there is a lot of potential with this recipe.  I have the recipe below with my changes and with my own frosting recipe to go with it. The picture below does not do it justice, but at least I remembered to take a picture this time. ;)


Cinnamon Rolls

1 quart So Delicious Original Coconut Milk or other nondairy milk
1 cup Canola Oil
1 cup Sugar
4 1/2 teaspoons Active Dry Yeast
8 cups (Plus 1 Cup Extra, Separated) all-purpose gluten-free flour
1 teaspoon (heaping) Baking Powder
1 teaspoon (scant) Baking Soda
1 Tablespoon (heaping) Salt
Plenty Of Melted Soy-free margarine (I use Earth Balance)
2 cups Sugar
Generous Sprinkling Of Cinnamon
_____
Frosting:
1lb Powdered Sugar
1 1/2 teaspoons Vanilla Extract
½ cup Coconut Milk
¼ cups Melted Soy-free margarine

Preparation Instructions

Mix the milk, oil and sugar in a pan. Scald the mixture (heat until just before the boiling point). Turn off heat and leave to cool 45 minutes to 1 hour. When the mixture is lukewarm to warm, but NOT hot, sprinkle in Active Dry Yeast. Let this sit for a minute. Then add 8 cups of all-purpose flour. Stir mixture together. Cover and let rise for at least an hour.

After rising for at least an hour, add 1 more cup of flour, the baking powder, baking soda and salt. Stir mixture together. (At this point, you could cover the dough and put it in the fridge until you need it – overnight or even a day or two, if necessary.)

When ready to prepare rolls: Sprinkle rolling surface generously with flour. Take half the dough and form a rough rectangle. Then roll the dough thin, maintaining a general rectangular shape. Drizzle 1/2 to 1 cup melted margarine over the dough. Now sprinkle 1 cup of sugar over the margarine  followed by a generous sprinkling of cinnamon.

Now, starting at the opposite end, begin rolling the dough in a neat line toward you. Keep the roll relatively tight as you go. Next, pinch the seam of the roll to seal it.

Spread 1 tablespoon of melted butter in a seven inch round foil cake or pie pan. Then begin cutting the rolls approximately ¾ to 1 inch thick and laying them in the buttered pans.
Repeat this process with the other half of the dough. Let the rolls rise for 20 to 30 minutes, then bake at 375F until light golden brown, about 15 to 18 minutes.

For the frosting, mix together all ingredients listed and stir well until smooth. It should be thick but pourable. Taste and adjust as needed. Generously drizzle over the warm rolls. Go crazy and don’t skimp on the frosting.


Friday, November 19, 2010

Dinner Rolls

Yum
I am so happy to say that I actually have a dinner roll recipe!  I have had so many failures in this department.  But, I found a recipe that works, and it's good!  And to top it off, it's gluten-free, dairy-free, soy-free, and egg-free...so I guess for you vegans, it's also vegan. :)  I really can't take credit for its brillance, I just adapted it from The Pioneer Woman's dinner roll recipe (if you haven't seen her blog, you will now be an addict, even if you are gluten-free...she is amazing!)  Below is the allergy-friendly version (which is also halfed, because it makes a ton, and we are only a family of 4), but you really should go to her website for her step by step directions...she does an amazing job!

Dinner Rolls

makes about 18 rolls

2 cups So Delicious Original Coconut Milk, its in a red carton (I used this for its fat, since its replace whole milk)
1/2 cup sugar
1/2 cup canola oil
4 1/2 cups Silvana's all purpose flour blend
2 1/4 teaspoons active dry yeast
1/2 teaspoon (heaping) baking powder
1/2 teaspoon (scant) baking soda
1 tablespoon salt...and yes, you want this much salt!

Directions
Pour the milk into a stock pot or dutch oven.  Add the sugar and oil.  Stir to combine and heat over medium to medium-low heat to scald the mixture.  Once the milk mixture has scalded (is that a word?), let it cool.  It takes about an hour.  The temp should be around 90-110F before you do the next step.

When the mixture has cooled, add 2 cups of flour and the yeast, and mix well.  Then add another 2 cups of flour, stir together and allow to sit, covered with a towel or a lid, for an hour or after its doubled in size.

Add another 1/2 cup flour, the baking powder, baking soda, and salt to the mixture.  Stir until combined.

At this point you can cover it and put it in the fridge until you need it (so you can make this ahead of time) or you can go straight to the next step.

Butter (using soy-free margarine) 1 to 2 muffin pans.  From the rolls by pinching off a walnut sized piece of dough and rolling it into a little ball.  Repeat and tuck three balls into each butter muffin cup. Once all cups have been filled, cover the pan and allow to rise for 1 to 2 hours.

Top rolls with soy-free margarine and bake at 400F for 17-20 minutes, and top with additional margarine.

Chicken and Wild Rice Soup

Yum
Yesterday, there was a church activity that I was helping with.  At that activity there was dinner...and there was going to be at least 5 people there that were gluten intolerant, and 2 of us who were also dairy intolerant.  So, I wanted to make an awesome soup, and I did. :)  To go along with it I brought Rosemary Almond Crackers, which were probably the biggest hit, and my walnut bread, which I made in mini muffin pans.  The gluten-free gals last night did not miss out on anything, instead we indulged. :)

I totally forgot to take pictures of the soup, but it was beautiful. :)

Chicken and Wild Rice Soup

serves 12+

3 tablespoons extra virgin olive oil
1 1/2 cups carrots, finely diced (~18 baby carrots)
1 1/2 cups celery, finely diced (~4 stalks)
1 1/2 cups onion, finely diced (~1 medium)
3 cloves garlic, minced
3 quarts chicken broth (I used Imagine organic, just to make sure it's soy-free as well)
2 1/2 lb chicken, cut into 3/4" cubes (~4 breast halves, you really could add more chicken, I just didn't have that much chicken in the house)
1 cup wild rice (you now the long black rice, not a blend of different rices)
1 cup rice blend (now here's where your rice blend comes in...)
2 bay leaves
2-3 tablespoons dried parsley
1/4 cup soy-free margarine
1/4 cup gluten-free all purpose flour
salt and pepper to taste

Directions
Heat olive oil over medium-high heat and add carrots, celery, and onion.  Cook 5-6 minutes, or until softened.  Add garlic and cook 1 minute.

Add chicken broth, chicken, rice, and bay leaves.  Bring to a simmer and simmer on low heat for 45 minutes or until rice is tender and chicken is cooked through.

Remove bay leaves, add parsley.  Melt margarine in a separate saucepan, mix in flour to make a roux.  Add the roux to the soup and mix well.  Add salt and pepper to taste.

Note: the longer it cooks the thicker it gets, because the rice will continue to asborb the broth.

Silvana's All purpose Gluten-Free Flour

Yum
Okay, I'm going to be using this a lot.  This is Silvana Nardone's all purpose flour from Cooking for Isaiah.  I'm giving her all the credit, because it is her blend...but a lot of my recipes are probably going to be using this blend, so I thought I'd pass it on, with my minor change--I use brown rice flour instead of white rice flour.

By they way, you really should buy "Cooking for Isaiah" if you haven't yet.  Or ask for it for Christmas. ;)

Update 1/25/12: I've decided not to have her recipe posted here.  It's her recipe, so I feel it isn't fair to her for people to be coming to my site for her work.  You can find her recipe on page 15 of her book, Cooking for Isaiah, which is part of the preview on Amazon.  So, go to Amazon, check out the flour recipe--and buy her book, it's a good book.  And, go here to check out my flour blend, it works really well, I really love it and use it now instead of Silvana's (her's is really good, too, though).

Rosemary Almond Crackers

Yum
I actually clipped this recipe out of my local paper of all places.  It's my Elana Ameterdam, the author of  "The Gluten-Free Almond Flour Cookbook", she has amazing recipes.  You can check out her blog here.  I have had it on my fridge for a couple months now, and finally tried it out and am so happy I did.  It worked perfectly with my soup last night that I took to a church activity. Below is the recipe with my slight modifications based on what I had on hand.

Rosemary Almond Crackers

1 3/4 cups blanched almond flour (I use Honeyville's almond meal/flour)
1/2 teaspoon course sea salt
1/2 teaspoon dried rosemary, crushed
1 tablespoon extra virgin olive oil
1 egg

Directions
  1. In a large bowl, combine almond flour, salt and rosemary
  2. In a medium bowl, whisk together olive oil and egg
  3. Stir wet ingredients into almond flour mixture until thoroughly combined
  4. Roll the dough into a ball and press between 2 sheets of parchment paper to ⅛ inch thickness
  5. Remove top piece of parchment paper
  6. Transfer the bottom piece with rolled out dough onto baking sheet
  7. Cut dough into 2-inch squares with a knife or pizza cutter
  8. Bake at 350° for 12-15 minutes, until lightly golden
  9. Let crackers cool on baking sheet for 30 minutes, then serve

Thursday, November 18, 2010

Udi's Gluten Free Plain Bagels -- Review

Yum
I love bagels, but I never really ate them that much.  So, going gluten-free I figured that was one of those bread items I could easily just live without.  And honestly, I probably could, but my mother-in-law but us a couple bags of the Udi's gluten free bagels, so I had to try them....and I haven't been able to stop eating them since.  They have the perfect bagel texture, chewy, but not to chewy, and not too heavy, yet they are nice and filling, so they make a perfect breakfast.  I actually like these better than their white sandwich bread, and we are never without that bread in our house (mainly because my little ones refuse to eat my bread :P).  I have been making ham and egg bagels for breakfast, and have been snarfing them down so fast I forget to take pictures.


It's funny how something you take for granted in a past life, becomes a treasure in this one...how I love bagels now!

Overall rating 10 out of 10  I honestly can't think of anything bad to say about it, other than maybe the price, but we're used to that, right?  They are so, so, so good!

Sunday, November 14, 2010

Caramel Apple Pie

Yum
Yes, it's gluten-free, dairy-free, and soy-free...and yes it has caramel! :) I found the recipe here, and it looked incredible.  Anyone that knows me, knows that I'm too lazy to make pies, that's why we have crisps in my house...but I really wanted to try this pie and try out the pie crust from "Cooking for Isaiah", so Sunday night is the perfect time to test it out.


Ingredients

1 recipe gluten free pastry for a 9 inch double crust pie
1/2 cup soy-free margarine
3 tablespoons gluten free flour (I used my 'Silvana's all-purpose flour blend')
1/4 cup water
1/2 cup white sugar
1/2 cup packed brown sugar
7 Granny Smith apples - peeled, cored and sliced ( actually only had 5 granny smiths, so I threw 2 fuji apples in there)

Directions

  1. Preheat oven to 425 degrees F (220 degrees C). Melt the margarine in a saucepan. Stir in flour to form a paste. Add water, white sugar and brown sugar, and bring to a boil. Reduce temperature and let simmer.
  2. Place the bottom crust in your pan. Fill with apples, mounded slightly. Cover with a lattice work of crust. Gently pour the sugar and butter liquid over the crust. Pour slowly so that it does not run off.
  3. Bake 15 minutes in the preheated oven. Reduce the temperature to 350 degrees F (175 degrees C). Continue baking for 35 to 45 minutes, until apples are soft. 
Note:  For those of you that are dairy and/or soy free, this caramel sauce is also fantastic for your dairy free ice cream and for dipping apples. :) 
The pie crust turned out decent, considering I don't do pie crusts. :)  It probably would taste better with a white or sweet rice flour, but I used a blend with brown rice.  It still worked, and I ate way too much, so no complaints here.  Once again, I would recommend getting "Cooking for Isaiah", it has the pie crust recipe in it, along with other fantastic recipes. :) 

Walnut Bread, made in honor of my family :)

Yum
Growing up there were a few foods that we had in abundance, mainly because we grew them or my grandparents did.  Some of those foods were grapes, plums, peaches, walnuts, apricots, and of course eggs from my grandpa's chickens and honey from his bees. (And that's just a few of them) :)

When I was small we had 3 walnut trees in our front yard, one is left, but that one produces more than enough walnuts.  So, every fall my parents are kind enough to share.  I love walnuts, I guess it's just comfort food that reminds me of home...and all the hours spent cracking walnuts. :)  The one problem with walnuts is the bitter aftertaste caused by tannins or tannic acid.  This is also why they turn black when cooked in dough or batter that has baking soda.  But this whole diet change has opened my eyes to blanching nuts, and I have discovered that by blanching walnuts it removes the bitterness, and if you are willing to skin them after the blanching (I know it's a lot of work, but it's not that bad) it'll help remove even more, and some of the blackness that occurs with cooking.

Because walnuts are so cheap in our family, I thought I would try to make a bread that would incorporate them.  I didn't want a sweet bread, because there are plenty of those, I wanted a sandwich bread, an every day bread.  So, I looked at Elana's Pantry since she cooks with almond flour, I figured I could adapt her recipe and at least have a start...and it worked!

This recipe is also awesome because it incorporates my grandpa's eggs and honey into it, too.  So, this is for my parents and grandparents...a bread in honor of all the memories created by home grown food. :) Just a warning, though, this bread is very filling, so slice it thin and plan on a small sandwich, because that's all that you will be able to eat.

Walnut Sandwich Bread
1 3/4 cups blanched walnut meal
¾ cup tapioca starch
½ teaspoon salt
½ teaspoon baking soda
4 eggs
1 teaspoon honey
1 teaspoon apple cider vinegar

Directions
  1. In a medium bowl, combine walnut meal, tapioca starch, salt and baking soda
  2. In a larger bowl, blend eggs 3-5 minutes until frothy
  3. Stir honey and vinegar into eggs
  4. Mix dry ingredients into wet
  5. Pour batter into a well greased 7.5" x 3.5" loaf pan (if you use larger, they will be short pieces of bread like what I have pictured) 
  6. Bake at 350º for 30-35 minutes, until a toothpick inserted into center of loaf comes out clean
  7. Cool and serve

Yes, the bread is still pretty dark...but at least it's not black.  I had left the skin on these walnuts, and I noticed that it was the skin turning black, hence skinning them in the future.  Below is the method of blanching, skinning, and creating a meal:

To blanch walnuts, bring water to a boil in a large saucepan.  Add walnuts and remove from heat.  Let stand for 2 minutes then pour off water.  The skins can easily be peeled off after they have been blanched.  Once they have been blanched, skin, and dried off, they can be ground up into a meal.  I used my blender, but I would use a food processor if I had one.  Just take a few at a time and pulse them to grind them up, don't do too much or you'll make a butter out of them.

Saturday, November 13, 2010

Cooking with Isaiah Part 2 and the best pizza ever, and I mean it this time!

Yum
Okay, so I have already reviewed the cookbook, Cooking for Isaiah, but I am still testing her recipes, and they are so good I have to bring this cookbook up again.  I made the banana pancakes with cinnamon goo (basically cinnamon syrup), and it was literally eating banana bread in pancake form with this warm, gooey, cinnamon syrup that just made it perfect comfort food.  Sadly, all of my boys (husband included) were being picky that night and they ate regular gf pancakes--they definitely missed out.  But when I made pizza, it was a different story.

She has mastered the gluten-free pizza crust.  Really, I think the key is using the pizza stone.  I finally pulled mine out that I got when I was married, and realized why these stones exist...if you don't have a stone, go buy one, now, I mean it!  Her crust is very simple and straight forward and it came out fantastic, crispy on the outside, chewy on the inside---and, and this is a big and, it was fantastic the next day for leftovers.  Not just okay, it was actually fantastic! It wasn't in the least bit soggy, like every other gluten free crust I've tried, it was still crispy, and chewy on the inside.

Really, go out and buy the book, this recipe you will use over and over and over again!  And while you're out, buy a pizza stone if you don't have one. :)

Wednesday, November 10, 2010

"Cooking for Isaiah" -- Book Review

Yum
I have fallen in love...with a cookbook.  My wonderful, wonderful Mom has helped me so much with this diet change.  She got me a Nutrimill, so I can make my own flours.  She also but a ton (and I mean she really did give me a lot) of brown rice flour, tapioca starch, and potato starch.  She has really been so supportive in so many ways!  I love her!  Thanks, Mom!  Anyway, to add to everything she's done for me, she bought me this cookbook.  Cooking for Isaiah is a gluten-free, dairy-free cookbook written my a mom who is cooking for her son.  That is exactly what I need!  She also uses rice milk, shortening and oils, so every recipe is very easily converted to soy-free, yay!!!

So far, I've tried her Cinnamon Toasted Waffles, Double Cornbread, Sloppy Joe Potato Skins, and Load Baked Potato Soup.  Tonight I'm making her Banana Pancakes with Cinnamon Goo...is your mouth watering yet, because it should be. :)

The Cinnamon Toasted Waffles are better than any cinnamon toast I've ever had...I gorged myself on them.  The boys were a little more picky, but I know as they get used to the new diet, they will definitely eat these. 

The double cornbread was so good out of the oven, and even 3 days after the fact (I'm eating some right now).  I made them as muffins instead of a loaf and it worked perfectly, but like any cornbread when it's cooled it crumbles a bit.  My only complaint was when they were fresh out of the oven, you could smell the apple cider vinegar that was in it...she used the vinegar to sour the rice milk (mock buttermilk).  You couldn't taste the vinegar, just smell it...and the smell went away once the bread cooled.  It was enough of a smell, though, that my little ones refused to try it, so I may just leave the vinegar out next time, or swap it with white vinegar or lemon juice.

When I made the sloppy joe potato skins, I simplified it....We had left over roast from Sunday dinnner, so I shredded that and added Manwich (yes, manwich is safe for our family, and I wanted to use up what was in the pantry).  I thought it was soo good, but I think I'm the only one that did.  I really love how she used potato skins in place of bread, genious, and scrumptious.  So, I may be doing this for tuna melts, and chicken salad, and much, much more. :)

I had baked potato innards left from making the potato skins, so of course I had to try her baked potato soup.  It was pretty good, but really it was even better as left overs the next day.  I'm not kidding, let the flavors mature in the fridge overnight (with the bacon), and you will have a really, really, really yummy soup.

One thing, or really two things that I really love with this cookbook is her recipes for all purpose flour and pancake mix.  I've come across other recipes, and I had a basic one that I used...but I never actually prepped the flour beforehand and stored it as an 'all purpose flour' mix.  With having these blends, she has made it so her recipes can be used by anyone.  If you're not gluten-free, just substitute regular all purpose flour! :)  And for those of us that are gluten-free, really make up a batch of the flour, stick it in the fridge, then when you need flour, you don't need to weigh out 4 different flours, just one, yay!!  The only change I made to her flour blend is that she uses white rice flour, I used brown rice flour, and it worked very well.

I would put up all of the recipes that I tried, but really you should just go out and get the cookbook, it's so worth it.  Whether you're gluten-free, dairy-free, or neither, it is so worth every penny you spend on it.  And it's a mom trying to feed her son and her family, so support her! :)

Sunday, November 7, 2010

How to make an absolutely fantastic GF/CF/SF birthday cake for a 3 year old!

Yum

I know it's a long title, but really this post is to tell you it's not that hard to make a fantastic birthday cake, and your kids will love you for it.  I use the King Arthur's Cake mix, it's by far the best mix I've tried, and one less thing I have to do by scratch on a busy weekend.

For those of you that know me, know that I go all out for birthday cakes, and this diet was not going to change that.  For those of you that don't know me here's some past birthday cakes for you:


So, I asked my little one what he wanted for his birthday cake this year and he said a dragon (because he is absolutely in love with How to Train Your Dragon right now).  Now I'm not a cake decorator or an artist, I'm just a mom trying to please her kids, so this isn't fancy, high quality work...but you don't need that.  Just spend a little extra time decorating their cake and it will mean the world to them, especially if they are food sensitive.

I found a dragon cake directions at Disney Family Fun website, and modified it to fit our diets.  So, like I said I used the King Arthur's Gluten Free Cake mix (adding canola oil, instead of vegetable oil), I used black Dots (we had leftovers from our Halloween stash) for nostrils, a jumbo marshmallow cut in half for eyes, dairy free chocolate chips for pupils, and gummy fruit slices for eyebrows, claws, and the spine. And of course, fruit rollups for the wings. :)

Below is a picture after I cut and shaped the cake:
 Here is right after I frosted and decorated it (minus the wings, because they are heavy, so we didn't add those until we were ready to sing Happy Birthday):
 Here is the finished cake:

 And of course with the candles (yes, coming out of the mouth, just like a dragon): :D

So, the cake was chocolate, and when I asked my little one what color the dragon should be, he wanted orange, and I thought if it's orange it may as well be orange flavored as well...it was a scrumptious combination with the chocolate cake.  So here is my soy-free modified 'butter'cream frosting:

Gluten, Casein, and Soy free Buttercream Frosting

1/2 C (1 stick) Palm Oil Shortening
1/4 C rice milk
1 1/2 tsp orange extract (vanilla extract or any other flavor you may want to have)
1 16 oz package powdered sugar
food coloring

Directions
1. Combine margarine and vanilla in bowl.  Beat until light and fluffy.
2. Add milk and powdered sugar.  Beat until mixture is smooth and creamy.

Note: if you want chocolate frosting add about 1/4 C cocoa and a tiny bit more milk to the mixture above.


Cake Decorating Tips:
1. It's easier to cut and shape a cake that's frozen.
2. Do a thin coat of the frosting to seal in the crumbs, let set and then frost a second layer that's thicker.

Saturday, November 6, 2010

Kinnikinnick Personal-Size Pizza Crusts and Daiya Cheddar Cheese -- Review

Yum
Never judge a company by one bad experience!  I'm so glad I haven't done that with Kinnikinnick, because there has only been one product (their bread) that we haven't liked, and this is no exception.  The Kinnikinnick Personal-Size Pizza Crusts is a pack of 4 personal size pizza crusts, perfect for our family of four.  You keep them frozen until use, just top with sauce and whatever toppings, bake at 375F for 10-15 minutes and viola! pizza, your very own!  And its the best tasting crust we've had yet...my older one said, "Mom, this tastes like restaurant pizza!"  Yay!

 
The only downside was the boys didn't like the leftovers the next day...I didn't mind them, but I think I'm about as unpicky as you can get.


Overall Rating 9 out of 10  Very yummy, even for my gluten eating husband, but didn't work as leftovers.


I love Daiya, thank you for making dairy-free, soy-free cheese that resembles cheese!  I wrote a review about their mozzarella shreds.  Okay, this one is really good, too.  It definitely reminds me of cheddar, or at least American cheese. ;)  It makes great grilled cheese sandwiches, and when my little one saw he could eat orange cheese again, he kissed the package--if a 3-year old will kiss a cheese package, you know its good!


Downside, like I said with the other post, no calcium, also it cost me $5.79 a packet. :(  But we're used to paying extra for everything, right?

Overall rating 9 out of 10 Really great taste and texture, but no nutritional value.

Thursday, November 4, 2010

Pina Colada Smoothie

Yum
I have smoothies about every single morning.  I'm lazy and don't like to chew my breakfast, I guess.  I usually just dump whatever fruit I have sitting around, combine with with some dairy-free milk, and viola! it's a smoothie.   Well, I thought I would actually try to write one of these creations down, becuase it was too good not to.  I had cut up a pineapple last night to have with our dinner and we had some left over, we also had some coconut milk left over from our Indian dinner on Sunday, so I knew exactly what I wanted for breakfast....

Pina Colada Smoothies
2 C fresh pineapple, chopped
1/2 C coconut milk
1/2 C rice milk

Blend together until smooth and enjoy! (Makes ~2 drink servings, or one filling breakfast for me)

Pumpkin Bread/Muffins

Yum
I love pumpkin bread, you know like the Great Harvest Pumpkin Chocolate Chip Bread?  So good, and so can never have it again...unless I make my own version of it...so here we go! :) And of course, it's gluten, dairy, and soy-free! :)

(I forgot to take a picture of these, but will post one when I take one)

Pumpkin Chocolate Chip Bread

1/2 cup palm oil shortening
1 cup sugar
2 eggs
1 teaspoon vanilla
1 (15 oz) can pumpkin
1 1/3 cup brown rice flour
1/3 cup potato starch
1/3 cup tapioca flour
1 teaspoon xanthan gum
2 teaspoons baking powder
1 teaspoon baking soda
3/4 teaspoon cinnamon
1/2 teaspoon nutmeg
1/4 teaspoon allspice
1/2 teaspoon salt

Directions

1. Preheat oven to 325F, and lightly grease (with canola oil) a bread pan or muffin tins.

2. Cream shortening and sugar until light and fluffy.  Add eggs, mixing well after each one.  Add Vanilla and pumpkin and mix until well blended.

3. In a separate bowl, combine remaining ingredients.  Gradually add the flour mixture to the pumpkin mixture and stir until combined.

4. Pour into prepared bread pan or scoop into muffin tins, and bake ~1 hour for bread or 30 minutes for muffins.

UPDATE 1/8/11: I now make them with 2 cups of my all purpose flour blend in place of the rice flour, potato starch, tapioca flour, and xanthan gum, and it works great!

Green Bean and Mushroom Saute

Yum
Okay, here's another side dish that will work perfectly with your Thanksgiving feast.  No, it's not green bean casserole, but it's fantastic.  I had thought about doing a gluten-free, dairy-free, soy-free version of green bean casserole, I saw plenty of recipes that would work, but you know what? The whole point of green bean casserole is that its a convenient dish, you throw a can of this in, with a can of that, top it with a can of fried onions, and ta da, it's a side dish.  Well, that all just got thrown out the window....the convenience is gone, so really is green bean casserole really that good? I really don't think its that fantastic, maybe I'm alone in this.  But I want simplicity, for goodness sake I have to make everything else from scratch, maybe I should try to simplify it all so I don't have a nervous breakdown.

So, I took the main elements from the green bean casserole: green beans, onions, and mushrooms and created this saute.  It's simple and delicious, and definitely lighter on the calories and fat. :)


Green Bean and Mushroom Saute

2 tablespoons olive oil
1/3 cup chopped onion
8 oz sliced mushrooms
1 clove garlic
salt and pepper to taste
4-5 cups fresh green beans

Directions
Heat oil over medium/medium-high heat.  Add onion and mushrooms, garlic, and salt and pepper.  Cook until onions and mushrooms have softened and cooked through.  In the meantime, steam green beans to a tender crisp.  Combine the mushrooms and green beans and cook for another 2-3 minutes to combine flavors.

This post was shared on Gluten Free Holiday Thursdays.

Soy-free Conversion of Past Recipes

Yum
Okay, this isn't a conversion of all the recipes I've done, but it's a start...I'll be posting what I did to convert the recipe as I actually make that recipe again, so you get them as I make them. :)  I'm pretty sure most people that have gone soy-free could easily convert any of the recipes I have to soy-free versions, so this is more for those of you that aren't soy-free, so if you ever have to cook for my family, you won't have to worry about making mistakes. :)

Dairy-free (and now soy-free) Ranch Dressing

Here is the link to the recipe, so convert it to soy-free use rice milk instead of soy milk and olive oil mayonnaise (or if you're not making your own mayonnaise, Best Foods has a Canola Oil Mayo that is soy-free) instead of regular mayonnaise...that simple. :) 


GF/CF/SF Banana Chocolate Chip Muffins

Okay, technically this isn't fully soy-free...the dairy-free chips that I used have soy lecithin in them, but many people with soy issues actually can handle the soy lecithin, so if you can't don't use the chocolate chips. :)  Here is a link to the original recipe, to make it soy free use palm oil shortening in place of the margarine and make sure to grease the muffin tins or bread pan with canola oil instead of vegetable oil.


Okay, I know, only 2 recipes, but I'm a busy, working mom, so you'll get more conversions as I get around to them. :)

Wednesday, November 3, 2010

Oven Fried Chicken

Yum
So, from my previous post you will know that now all of my recipes are going to be gluten, dairy, and soy free.  This recipe is sooo good, really it's almost addictive, and kid friendly, especially if you use drumsticks like I did.  My older son loves the built in handles...he downed 2 of these, and they were not small drumsticks (I only had 2, so he really liked them).  I adapted it from a Better Homes and Gardens recipe:


Oven Fried Chicken

1 egg
3 T rice milk
1 1/4 C cornflake crumbs (I use the Southern Homestyle Gluten-Free Corn Flake Crumbs, they are so good and work great for when you don't feel like making your own crumbs)
1 teaspoon dried thyme
1/2 teaspoon paprika
1/4 teaspoon salt
1/8 teaspoon pepper
2 T olive oil
2-3 lbs meaty pieces (I used nice meaty drumsticks)

Directions
1. In a small bowl combine egg and milk.  For coating, combine crumbs, thyme, paprika, sal, and peper; stir in olive oil.  Skin chicken.  Dip chicken into egg mixture, then coat with crumb mixture.

2. In a greased baking pan arrange chicken, bone sides down, so the pieces arent touching.  Sprinkle peices with any remaining crumbs.

3.  Bake, uncovered, at 375F for 45-55 minutes.  Do not turn pieces while baking.

Note: this also makes for great chicken tenders or nuggets.  I used my left over crumbs for nuggets to freeze to take to daycare, they were very yummy. If you do use the left over crumbs for chicken nuggets, use them immediately, since the crumbs could harber harmful bacteria from the raw chicken and egg if stored for any amount of time.

Sweet Potato Casserole

Yum
So, I'm starting to test out recipes for thanksgiving...I've had a lot of failures, so this is the first one that I'm actually putting on the blog.  My husband ate it!!! If anyone one know my husband, they know that he is very picky, especially with vegetables.  He just doesn't eat them, except for corn and raw baby carrots.  So, for him to eat 2 helpings of this casserole (and mind you its gluten free, dairy free, and soy free) means that this is definitely a success!  Now, if I could just get my kids to try, I know they would love it, I mean its like eating dessert for dinner, you can't beat that! (You know it's good, when I forget to take a picture before we down half of it!) :)

Sweet Potato Casserole

Sweet Potato Mixture
4 cups sweet potatoes, cooked and mashed*
1/2 cup brown sugar
1/2 teaspoon salt
1 teaspoon vanilla
2 T rice milk or coconut milk, if needed

Top Crust
1/2 Cup Brown Sugar
1/3 Cup Tapioca Starch
1 Cup Chopped Pecans
1/2 Cup Palm Oil Shortening

Directions
1. Preheat oven to 375F
2. Coat a medium sized casserol dish with canola or olive oil.
3. Combine sweet potatoes, sugar, salt, vanilla in a large mixing bowl.  Whip by hand, if liquid is needed add some rice or coconut milk.
4. Pour mixture into baking dish. (tip: if you are doing this for thanksgiving, you can make the sweet potato part ahead of time, then stick it in the fridge until you're ready to bake it).
5. Topping: Combine brown sugar, tapioca starch, and pecans in a bowl.  Cut in shortening.
6. Sprinkle the topping mixture over the sweet potato mixture.
7. Bake for 30 minutes.

Soy!!! :(

Yum
Okay, I said I was just going to have this blog be recipes and reviews, but I need to write this, because this will change future recipes and reviews....I'm pretty sure my little one can't handle soy, so now he is gluten free. dairy free, and soy free. :(

When I first took him off of gluten, I knew dairy was a problem, because his behaviors and sensory issues really hadn't improved a whole lot.  I knew he did had a gluten problem, though, because of the 4 days of 'withdrawal' hell we experienced when we took him off the gluten.  So, when we got the results back from Enterolab we immediately took him off the dairy. He did so much better that first week, he was happy, goofy even, he had normal bowel movements, was eating great, he was a normal kid, finally!  But, the next week he started getting cranky, and having more of what I called bipolar moments, where his mood would suddenly and drastically change.  I dismissed it as him being a 3-year old, come on 3-year olds can be quite moody, right?  Well, by the next week, it was obvious it was more than him being misbehaving toddler.  His behaviors turned aggressive and even violent.  It truly frightened me, I know that something had changed in him and that's when I realized that we had easily tripled his soy consumption since going dairy-free.  He was drinking soy milk, eating soy margarine, we were deep frying chicken nuggets and corn dogs in vegetable oil (soybean oil)...the list goes on.  I was literally sick, what had I done to my baby!?!?  Within minutes of having this sick realization, my sitter called me to tell me that something was wrong with him, that they really could not handle him anymore...could it be the soy?  That was enough to confirm for me that (1) I wasn't imagining his behavior and (2) it was soy.

So, we have a well child checkup on Friday, and I'm going to be bringing all this up with the doc then, but in the meantime we're cutting out the soy.  We started the new diet on Saturday, and my baby is back, he's happy again (yes, he still has his 3-year old tantrums, but they aren't murderous outbursts now) and he's back to being a normal kid. I really am hoping and praying that this is the last intolerance we have to deal with.

Gluten Free Dairy Free Indian Food

Yum
So, I was craving Indian food. I love it and I love that I can still eat it. So many ethnic cuisines are naturally gluten free, so it's good that I love ethnic foods...if only my family felt the same way....

I attempted a few Indian dishes, the first was a success so I have the recipe below, the others need more work, so I'm not even going to mention them...

I got this recipe from Stephanie O'Dea's blog, "A year of slowcooking" I love her blog, because it's all gluten-free, there is still plenty I would have to convert or just forget about making because of the dairy, but still, tons of usable recipes...but anyway, this one is for Chicken Korma, I modified it slightly, but all in all it's about the same as she has.  Here's a copy of it:


Chicken Korma (Gluten/Dairy Free)

1 1/2 lbs boneless, skinless chicken breasts, cut into chunks
2 medium potatoes, peeled and cut into 1/2" chunks
1 1/2 C (about one medium) onion, chopped
1 (14.5-ounce) can stewed tomatoes and juice
2 garlic cloves, minced
1 teaspoon curry powder
1/2 teaspoon gorund cloves
1 teaspoon salt
1 cinnamon stick
1/2 teaspoon chili powder
1/2 cup Coconut milk
1 T corn starch  (mixed in with 1 T cold water)
cooked basmati rice

Directions

Put chicken into the bottom of the crockpot.  Add potato and onion.  Pour in tomatoes, and add garlic and all the spices.  Cover and cook on low for 6-8 hours.  Discard the cinnamon stick, and stir in coconut milk.  If it still seems too runny, add in the corn starch mixture. Serve over rice.